 Graham's Photography Blog & Technical Reviews
Just Look What 4K Photo Mode Can Do!
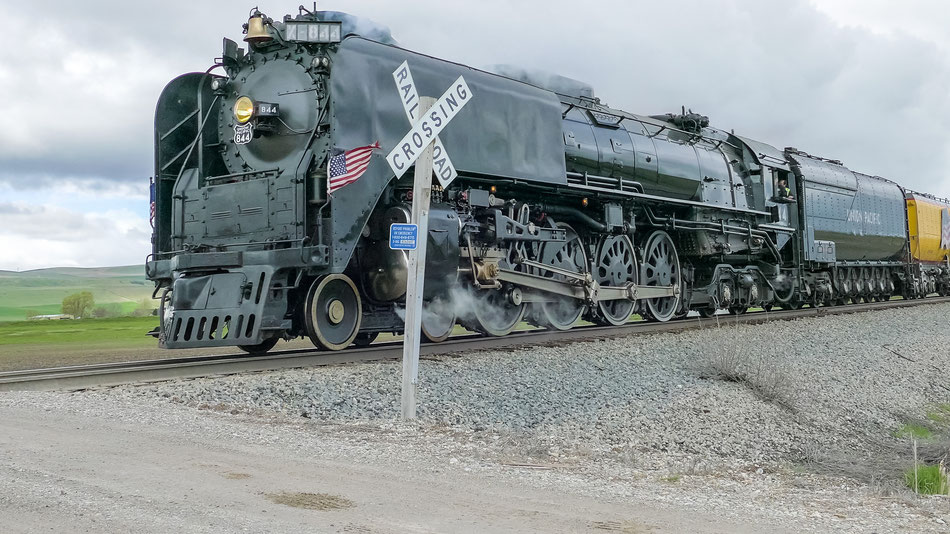
An image sent in by reader Ross Trowbridge shows what can be achieved by photo extraction from the 4K video mode of the FZ1000
Quote from Ross "I've never played with the 4k photo mode on my FZ1000. Yesterday, one of the Union Pacific railroad's old steam engine, the 844 (a 4-8-4 Northern) came through our valley and I thought I would give it a try. I was amazed at how clear the still frames I grabbed turned out. The train was going around 60 MPH as it went by.
The image is cropped, as the tripod I was using wasn't nearly as level as I thought it was, and I had to do some straightening in PhotoShop. But I am very happy with the result. I'm just happy the rain held off until after the train had left".
click for full size image.
Getting Better Audio for Video Recording
In a video recording often bad images such as those under or over exposed, wrong colour temperature, slightly out of focus will be tolerated by your viewing audience however, poor audio is likely to have them reaching for the off button.
Unfortunately the internal stereo mics of the FZ1000 are badly isolated from the sound of the OIS (optical image stabiliser) emanating from the lens housing. Even with the OIS turned off you can still hear the sound of the electromagnets as they are holding the lens element in the centre of the image path. In a very quiet recording environment you can clearly hear this noise and it will interfere with your audio recording. If the camera is set for auto recording then during the quieter periods the camera also has a tendency to raise the gain of the amplifiers (auto gain control or agc) and this makes the system even more likely to record this sound.
The only way to get decent audio is to use an external mic plugged into the 3.5mm (1/8 inch) mic port on the side of the camera.
This microphone may be one of a number of electret condenser microphones that are currently available. They can be hot shoe mounted, lapel (Lavalier), studio desktop or shot gun mics.
Each one of these mics can play a role in getting you very good audio for your recordings.

The simplest option is probably an on-camera microphone such as the Rode Videomic shown adjacent. This is a very good microphone for picking up natural sound but with the ability to provide sound rejection to the side of the mic because of its "rifle" type design.
These "cardioid" or "super cardioid" designs of microphone are useful when trying to eliminate unwanted sounds in you video. The longer the "rejection" tube of the mic the more the frontal lobe of the sound pick up becomes narrower and the side rejection becomes stronger.
They don't, as some people suggest, act as a form of telephoto lens for audio. They do not amplify or bring the sound source any close they simply provide a pick up pattern which can be used to select the sound source or reject unwanted off axis noise sources.

The mounting of the microphone "on-camera" is not the best option for picking up the best sound. The idea that the cardioid pattern of pick up - especially from the narrow front lobe of a "rifle" type microphone and that it can be used to selectively reject off-axis noise is better utilised when the microphone is angled in such a way that the wanted sound source is in line with the front pick up lobe and that the unwanted noise is in the side rejected area.
In the image opposite such a rifle type microphone is positioned above (or it can be placed below) the sound source - in this case for an interview type scenario. The from of the microphone picks up the sound coming from the subject whilst the sides of the mic are being used to reject any local ambient noises.

Another common method of audio pick up is to use "studio" type condenser microphones.
These devices are normally powered externally by a 12-48v phantom power supply although some are able to be powered by the bias voltage often provided by the microphone input pre-amplifiers of the camera.
The FZ1000 provides such a small bias voltage. This can be used to power the condenser microphone but the quality is not as good as if you had used an external pre-amplifier utilising a 48v phantom power supply.
These microphones are best used very close to the speakers mouth, or instrument if they are being used to record a music session. By this nature the microphone is likely to be in a position that is "in-shot"
Used close up like this the mic input levels can be turned down thus improving on the signal to noise ratio and rejecting background noise. The sound quality can be very good and provide a very nice "golden" sound with rich bass.
These microphones usually need a "pop" filter to prevent the explosive sounds of the pronunciation of some words and syllables.

Another option for getting great audio quality into the FZ1000 is to use a wireless lavalier mic system. The one illustrated here is the Sennheiser EW100 system. This is a professional grade system designed to provide maximum signal to noise ratio with very little RF distortion. There is a "body pack" worn by the user and a receiver pack which then plugs into the mic input port of the camera. The range of these devices can be over 100 metres (300 feet) outdoors.

A cheaper solution, which again uses a FM wireless band to transmit the audio to the receiver, is this Samson airline system. The advantage of this system is its very small size and both units have rechargeable lithium batteries whereas the Sennheiser has 9v PP3 batteries to power both the transmitter and receiver.
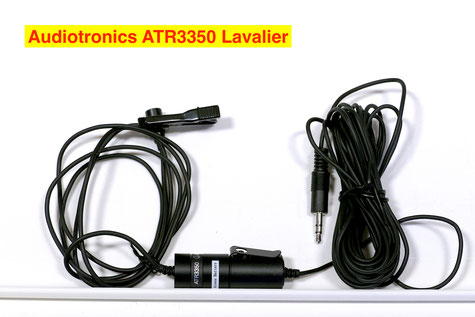
There are wired lavalier systems which can have over 20 feet of cable.
These can have several advantages in areas of high electrical interference which may affect the wireless systems.
The disadvantage is the fact that as the user is "tethered" to the camera if you forget this fact it is possible to pull over the camera if you walk away without disconnecting the cable from the camera.
Keep the mic about 8inches below the chin to the user. Too high and the audio becomes muffled, too low and the sound level maybe too low and pick up far more background noise.

The Audiotronic mic, shown above, has a 1.5v battery to provide power for the electret mic element. The FZ1000 has enough bias voltage available at the mic input port to power a simple electret element such as the one shown opposite. The audio quality can be surprisingly good for such a basic implementation
The Extended ISO Settings
The "extended ISO" settings provide additional ISO settings outside the "native" ISO values
of the camera. Normally one extra value below and one extra value above the native ISO range is provided. The question is whether these extended values provide any benefit for RAW or JPEG
shooters in providing either lower noise and higher dynamic range at the extended low setting.
With a camera like the FZ1000 beyond the native ISO of 125 we find L100 and L80 meaning that there is effectively 1/3 and 2/3 stop extra low ISO setting.
Now how this equates to the final image quality depends upon a few factors and is probably one of the most heated arguments that exist amongst users. Certainly at the extended hi settings it is very obvious that the noise is very much more evident. It has been suggested that the actual analogue voltage amplification used to increase the sensor apparent sensitivity actually stops at ISO 800 and that every value beyond that is achieved by digital calculation.
It can be speculated that if you need higher ISO than 800 it is better to shoot at ISO 800 and be underexposed and then post process the RAW file. The resulting JPEG from the RAW conversion will probably contain less noise and higher detail than an out of camera higher ISO file. (something I have not tested!)
Of more importance to me is the low end ISO values. Wherever and whenever possible I always shoot at the lowest so called "native ISO" 125 in the case of the FZ1000, 200 in the case of the GX8 (extended ISO is not applicable to FZ300/330).
The fact that the extended Lo range is applicable to the RAW file as well suggests that the reduction in ISO is "real" and not an extrapolated or software generated value.
If the gain is reduced then providing the sensor receives the necessary light to enable the exposure it should produce images with reduced noise and increased tonal range.
However there is a caveat in all this. If the gain is not reduced then the extra exposure will push the highlights into the clipped region and actually reduce the tonal range.
If the lighting can be assured not to exceed the level of which no highlight clipping will occur then the extra detail that is able to be captured with ISO 80 would be of interest.
I did a number of tests at ISO L80, L100, ISO 125 and ISO 200 to see just how this stacked up in a studio controlled shoot.


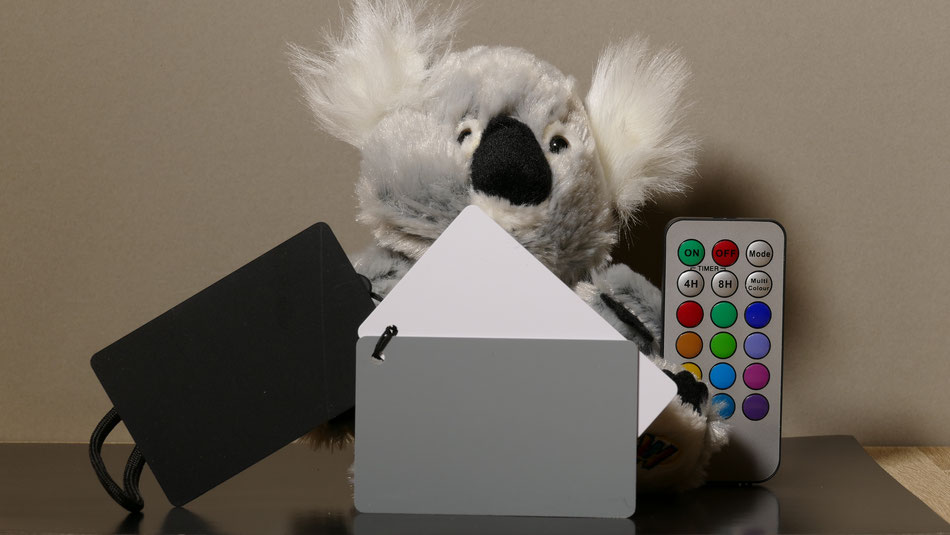

Cropped enlargements from the above images. click for full sized view

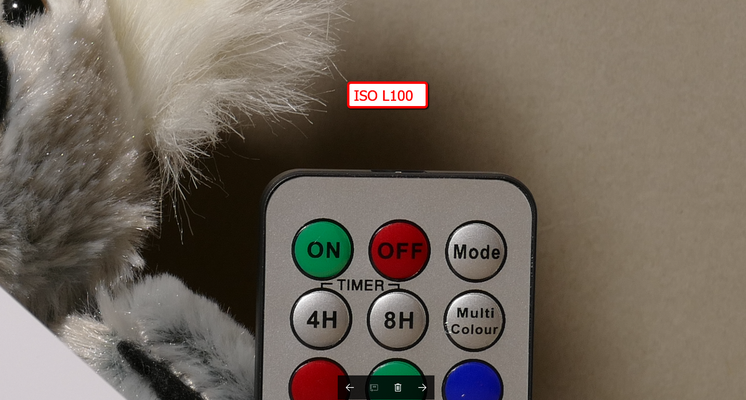


As you may see, and at least to my eye, there is no loss or increase of detail or tonal range when using the extended Lo values. As there is virtually no noise at ISO 125 there is little difference, if any, in the extended Lo 80 and lo 100 setting. There is some argument that the extended Lo range causes highlights to clip more easily and I tried to test this using a bright sunlit scene outdoors.


From this 200% cropped image section you can probably see that the images are almost identical. There is a very slight loss of resolution at ISO 400 and at ISO 800 the definition in the brickwork is beginning to blur and the colour saturation has decreased a little.
So, although not a real scientific test to me it does show that there is little evidence to suggest that highlights blow out more easily when shooting JPEG at these extended Lo values. It may be that using the RAW file format that more noise can be controlled using the extended Hi ranges but as a rule I never shoot with ISO beyond 800 with this (or any other M4/3 or 1" sensor camera and never shoot RAW)
At the "native" ISO range I find that given the right exposure most out of camera JPEGS are extremely good and with the sharpness parameter set to 0 with a little post processing the images are as good as I can get even if I processed the RAW file.
Flash with the FZ1000 & (FZ300/330)
Choosing and using flash units to work with the FZ1000 for both on camera and wireless off camera modes.

Fortunately the process of choosing flash units with these cameras isn't as problematic as choosing them for the earlier FZ200 version and all those that are labelled M4/3 or four thirds for Panasonic or Olympus seem to work in the TTL mode. The only exception that I have found is the Meike 300 which appears to work only the GH1/GH2 in the TTL mode.
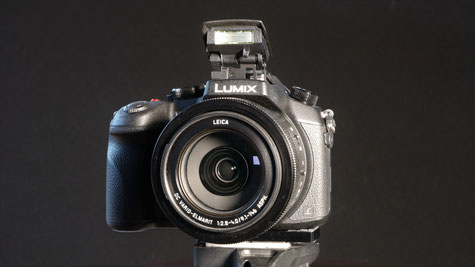
The pop up flash unit on the FZ1000 (FZ300/330) is fine for images up to a distance of about 3 metres (10 feet) when used indoors where there are some reflective materials to bounce back the light but it produces very unflattering images with hard sharp edged shadows behind the subject.
These can be softened slightly by using clip on diffusers which make the light source appear as a larger area rather than the point light source but the light provides no modelling resulting in quite unflattering images.
Its main advantage is that it can now be used as the wireless flash commander of external flash units and be either the fill in flash in this group or just act as the transmitter in the set up.


If you want the convenience of an on camera flash unit which will provide a higher flash output and can be used to bounce light from white walls or ceilings to provide softer lighting then there are several units that can be used.
Here the Meike MK320 is being used in the TTL mode.
TTL mode allows the camera to control the flash exposure just as it would with ambient lighting. It uses a pre-flash pulse to determine the amount of light being reflected back from the subject and then sets the power of the main flash burst accordingly.
If the result is under or over exposed then as with ambient lighting we can use flash exposure compensation to correct the exposure.
On most guns you can apply this at the flash head or you can adjust the power with the flash exposure compensation menu within the camera itself.

The flash unit exposure compensation (FEV) used to adjust flash output power in the TTL mode

On the Nissan i40 the exposure compensation is very easy to set using the right hand dial on the unit. In either the TTL or flash slave mode.
The original Panasonic FL36/360 flash units provide basic TTL flash with full bounce and swivel adjustment when used on camera but do not have slave capability to be used wirelessly off camera. The later 36R/360R units have been updated to provide this feature.

When using the pop up flash as the commander flash for remote TTL or manual flashes it is necessary to set up the flash to provide this facility.

First access the flash menu and then the Wireless set up feature on page 2/3 and set this to ON.
Then set the wireless channel number. (Leave it to the default of 1 if you are not using multiple light set ups)

Then on page 3/3 set up the wireless mode.

In this Wireless set up function it is necessary to specify whether the pop up flash is used as part of the exposure or is just used to act as the main controller (where built in flash is set to OFF).
Next set whether the flash group (A,B or C) will be TTL controlled or manually set. Not only does the built-in wireless control allow you to trigger the flashes, but even adjust the flash units from the camera itself. For example you can put flash in one of four channels (1, 2, 3 or 4), and then each channel can have three groups (A, B and C).
A different channel would be to keep multiple photographers from firing each other's flashes, or for an individual photographer to have multiple setups in the same room. Then the A/B/C groups allow you to control the output of individual groups of lights within a channel/setup. For example, your main light(s) could be channel A, and your background light(s) channel B, so you could independently make one darker or brighter than the other — all from the camera itself.

With each of the slave units it is necessary to set the group (and channel number on some systems) so that you can distinguish which flash is doing what.
For example you may have the main flash on Channel A and the fill Flash on Channel B. Making adjustments from the camera is then a simple matter of adjusting the output for that group letter.
In the illustration I have added +2EV to the output of the main flash which is on group A setting

If you don't have a compatible TTL wireless controlled flash gun then you may be able to use a gun which features optical slave triggering which supports the S1 and S2 triggering modes. S1 is when the main flash just has one pulse (such as when used manually) and S2 is used when the unit is to fire synchronously with the second burst of light from those units having the TTL pre-pulse system to measure the light reflected back.
Obviously the guns must be set up in the manual mode, the intensity of the light being adjusted individually at each of the slave path lights.
On the Nissan i40 the SD is is pre-flash suppression and SF the single flash mode.
Besides optical triggering for either TTL flash or manual control there also exists the possibility of using radio triggering units which require a transmitter to me mounted on the camera hot shoe and a receiver to be fitted to the hot shoe of the slave flash. Again the system becomes a manual operation, the power reach flash being set manually. The advantage of this system though is the extended range of operation between the transmitter and receiver and it doesn't need to be in line of sight.

The Yongnuo 603 II can be used on Panasonic systems as the radio trigger requires only the central electrode to enable the firing of the remote flash. The unit on the camera is set as the TX and the one on the slave set to TRX. The flash must be used in the manual mode.
With both units set as TRX it is possible to use these two units as remote control to fire the FZ300/330/1000 remotely if you use a suitable cable such as this one on Amazon USA http://amzn.to/2irgCOE and on Amazon UK http://amzn.to/2hn4531

The Yongnuo 603 II used as a wireless remote controller utilising the remote cable from the pixel controller.

Using the S1 optical slave function on each of these four diverse manufactured flash units (Nikon and Canon dedicated units) they are firing using the main flash of the on camera pop up unit in manual mode.
It is possible to create a multi-flash set up using the on camera pop up flash as the main trigger.
Providing all the units can "see" the trigger pulse you can create sophisticated lighting set ups using different powers on each of the flash units depending upon the lighting type that you are creating.
Using this method of using multiple low power setting outputs allow you to use the fastest flash pulse to freeze action shots. The 1/128 power might give you 1/8000 exposure where 1/1 power may only give you 1/500 second.

The menus of two of the flash units showing the unit set up as 1/128 power and in the S1 slave mode. S1 is used when there is no pre-pulse as with a manual fired pop up flash. It is the preferred way to fire multiple flash units.
Because each unit needs to "see" the flash radio triggering of the units using one on camera trigger and space units on the flash hot shoe is the most reliable option.
Close up photography with the FZ1000
Some considerations for choosing supplementary lenses to be used in conjunction with the FZ1000 for close up photography.


With its large 62mm lens thread trying to attach close up lenses like the Raynox series results in some heavy vignetting unless the lens is zoomed in to about 300mm EFL.
Whilst the results are perfectly acceptable it limits the scope for using those lenses.
Example image
Image Raynox 250 mounted on the FZ1000, zoom set to 300mm, working distance about 30cms.
I've found that the close up lens sets, often including #1,#2 and #4 lenses offer a very cost effective introduction to close up photography.
I would recommend getting a known branded name like "Hoya" as these tend to be multi-coated and have slim mounts which are usually the hallmark of a decent filter. using such a filter gets around the vignetting and you can use the lens with all zoom settings which adds to its flexibility.
Hand held and AF modes are possible with the lower power dioptres however, macro should be done using a tripod to provide a solid base to shoot.
The #1 filter adds good close up gathering ability yet keeping a reasonable distance from the subject - ideal for the larger insects like butterflies where you need to keep a reasonable distance from the subject

As the front lens diameter of the FZ1000 is just a little over 50mm it is possible to use 52mm or 58mm lenses (using step down filter ring) rather than buying the more expensive 62mm type.
Lenses like the Canon 250D and 500D make ideal close up companions giving you the flexibility of image magnification with the 500D or working distance with the 250D.
It really depends upon what your intended subject is, flowers or insects for example.
Remember though it's nice to see high magnification close up views they always come at the expense of very shallow depth of field.
A couple of sample images from the FZ1000 with the 52mm Sigma macro lens with stepping ring and the 62mm Hoya #1 close up lens.

HDMI LIVE OUTPUT STREAMING
It is possible to use the HDMI port of this camera to provide a "clean" HDMI signal for live streaming either a 1080p or 4K video signal from the camera. You can use this for recording the 4:2:2 signal on an external HDMI recorder, display the image on a large monitor or feed it into any other device that will ingest a HDMI signal. The signal remains live as long as the camera doesn't hibernate so can be used to provide a HDMI signal for longer than the 29min 59sec limit imposed on internal recording.
Providing you make the following changes in the FZ1000 set up menu (the wrench menu).
Go to page 3/5, and select the top option (TV Connection). Turn off HDMI Info Display (REC).
You should also turn off the VIERA Link option, since some recorders don't support or play correctly with embedded CEC
control.
However it is not possible to simultaneously record internally at the same time - you will just get a message video recording in progress.
Creating Time Lapse Videos with the FZ1000

The FZ1000 and cameras like the G6 and GH4 support the ability to create stop motion and time lapse videos.
The FZ1000 has a built in intervalometer where the start time, interval between shots and the total number of shots can be programmed. Optionally the camera can make a video clip from the frames captured or you can use the individual images to create your own sequence if your video editing program supports this.
This function can be used in the iA modes and the PASM modes.

The REC Set up menu provides the options tp program all the parameters for the time lapse operation. You will find it on page 2 of the REC Set up menu screens.

Choose the Time Lapse Shot Option

Program the start time - it can be NOW or any time you dial into the control.
You can set the time to start recording.
Any time up to 23 hours 59 minutes ahead can be set.

Set up the shooting interval.
At 25 frames per second you need to calculate the number of frames needed to complete the anticipated run time of your video.
so 10 seconds of final video = 10 x 25 frames = 250 shots
• A recording interval ranging from 1 second to 99 minutes and 59 seconds can be set at 1 second interval.
• The number of pictures ranging from 1 to 9999 can be set.
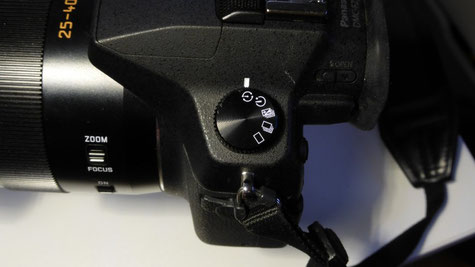
The time lapse mode must be set on the top shooting mode dial
THE SEQUENCE BEGINS ONCE YOU PRESS THE SHUTTER BUTTON.
• The recording starts automatically.
• During recording standby, the power will turn off automatically if no operation is performed for a certain period. The Time Lapse Shot is continued even with the power turned off.
When the recording start time arrives, the power turns on automatically.
To turn on the power manually, press the shutter button halfway.
• If [Fn2] is pressed while this unit is turned on, a selection screen asking you to pause or end will be displayed. Operate in accordance with the screen. Also, if [Fn2] is pressed
during the pause, a selection screen asking you to resume or end will be displayed.

the timer will complete and you will have indication that the sequence has finished.

With the option to create the final video from this sequence of still images you are presented with the option to create the following clips 4k/25p, 1080/50p, 1080/25p, 720/25p and vga/25p based on PAL setting.
NTSC will be 4K/30p, 1080/60p, 1080/30p, 720/30p and VGA/30p
Next choose a frame rate 50/25/12.5/8.3/6.35/5/2.5 PAL
60/30/15/10/7.5/6/3/1 NTSC