 Graham's Photography Blog & Technical Reviews
Older Entries From Phototalk Pages
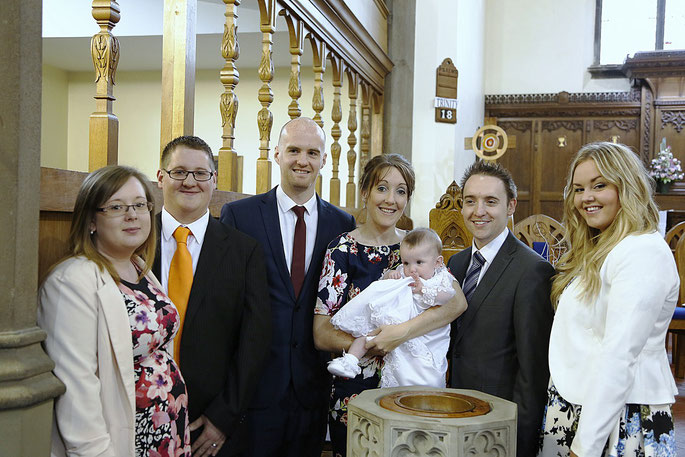
This weekend saw the Christening of our Granddaughter Elise at the local Parish Church.
I took my Canon 5D MK3 and the Panasonic Lumix FZ1000 with the intention of shooting 4K video with the FZ1000 and extracting still images from the file. It turned out my options became limited as I was not allowed to take photographs during the actual ceremony. The ambient light was really low and I ended up with 1/30 @ F4 using ISO 1600 with the 5D. What did become apparent when I got home to review the images was the number of images which were borderline due to the very shallow DOF using anything more then the wide angle end of the 24 - 105 lens. In contrast images taken with the FZ1000 at the same exposure had more DOF and also stood up extremely well against the 5D images in terms of quality.
This image is from the 5D with the 24-105mm set at 24mm and there is barely enough DOF to cover this small group at a distance of about 2 metres.
Photostyles and sharpening parameter

12th December 2013
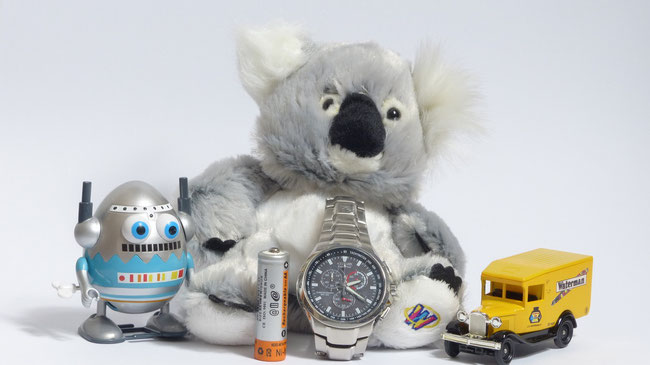
Following a discusssion on DPreview about my choice of sharpening and noise reduction for the Panasonic Lumix FZ200 I thought I would upload the source images which verify why my choice of numbers aren't purely relying on the numbers that worked best for the Lumix FZ150. My results show a counter- arguement made about Natural being the best photostyle as it was suggested that at a value of +1 sharpening with the Standard photostyle showed that my jpeg images were suffereing from jpeg artifacts and over sharpening.
Over sharpening tends to produce high contrast edge definition and "white halos" around dark edges. I see none of those in any of my images!
secondly, JPEG artefacts are usually as a result of over compression - such as you see when images are saved with low % quality numbers used to create smaller file sizes (the images in the book have a 60% quality %)
Let's put this into context. All my recommendations for the FZ200 have always centred on using ISO's of 400 and less. The values for sharpening and noise reduction of +1 sharp and -2 noise reduction work perfectly with any image in this ISO range. If you read Panasonics guide about photostyles Natural is defined as a "soft and natural looking picture". This would tend to suggest that the OOC (out of camera) JPEG image has had some "bluring" effect added. I would strongly argue that there is no way in post processing can you recover the pixel boundary definition (the parts of the image which make the image look sharp) that has been lost during this process. Standard photostyle with the noise reduction turned off (at -2) (as noise reduction is achieved by slight bluring which will kill extreme detail) will give a much more detailed OOC image. If you want to use the image without further processing add the +1 sharpening to the values.
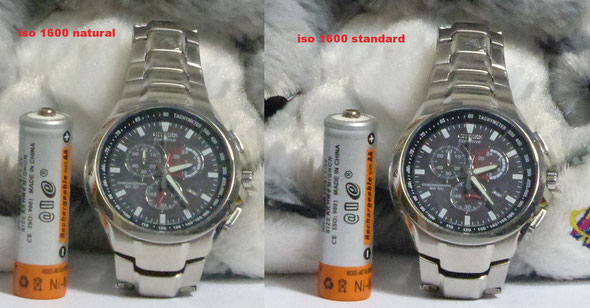
See the images below, as you increase the ISO, the natural photostyle looses detail far quicker than the equivalent in the standard photostyle
Here are my images for you to draw your own conclusions and the original files are available below if you want to do your own pixel peeping.


28 October 2013. Image Ratios, Image size and Output Requirements
When shooting an image, before pressing the shutter button consider a few things which might allow you to get better images
1. What is the purpose of the image - will it be used to make a print. If so how big will the print be?
2. If it is a print what will be the print format?
3. Will the image be used for HD video slideshow or a still in a HD video?
4. Will the image just be used for web images?
If your image is intended for a hard copy print then it makes sense to set the camera image aspect ratio to match that of the intended print aspect ratio. For example are you creating family snapshots for distribution as 6x4 inch prints or do you intend them to be larger format prints such as 8x10. There are internationally agreed paper sizes such as the 4x6inch ( 100mmx150mm) which fits the 3:2 image aspect ratio and 8x6inch ( 200mm x 150mm) which corresponds to the 4:3 image aspect ratio. Other sizes like 10x8inch or 7x5inch require some image cropping. This need for cropping demands we make some allowances when we frame our subject in the viewfinder. If you intend using a standard print aspect ration then choose the camera set up which will give you this. Print size will dictate the image size which will be needed to print this large.
Most printers use 300 dpi (or pixel per inch) as the standard image resolution requirement. So, for example if you intend to make 4x6inch prints the image needs to be 4 x 300 pixels high by 6 x 300 pixels wide which gives a 1200 x 1800 pixel requirement. If you shoot with an image size which does not produce this size then if the size is lower either the printed image will have white borders, or if the printer software "scales" up the image to fit the proposed image size then the image will be of infereior quality and may show signs of "pixellation". If the image produced is larger than the desired output then again if the printer software "scales down" the image there will be no loss of image quality in this case. Having an image which has maximum captured pixels has the advantage that it allows for some image cropping to take place with very little, if any, quality loss. In video inserting a 12M image into a 2M 1920x1080 HD video allows for a lot of cropping or "software zooms" to be made on this image. When shooting for video stills remember most output is now HD with a 16:9 aspect ratio. If you shoot 1:1, 3:2 or 4:3 there will visible borders showing in the finished video clip. Ideally you should shoot with this in mind and set 16:9 as the camera image aspect ratio. If you already have images with non 16:9 aspect ration then you must be preparred to do some "time line editing" to prevent the borders from showing. A neat trick if you cannot re-size a non HD aspect ratio image is to put a much enlarged, out of focus background made from the same image to cover up the black or grey borders. So in conclussion always shoot at the highest image size at the aspect ratio which will match your desired output medium if you want the best possible image quality in that medium.

10th December 2013
Whow! didn't expect the huge demand for the eBook. Dropbox 20GB download limit reached within a few hours. Opened a Mediafire account to help get the initial users who want the download the ability to download asap
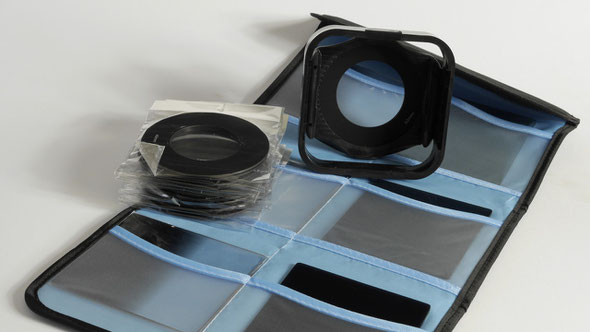
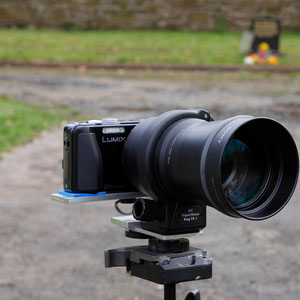
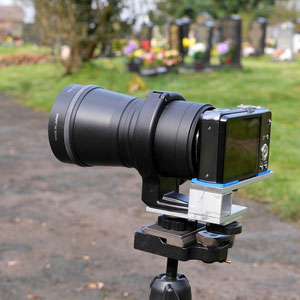
Neutral Density Filters (ND) 22nd October 2013
ND filters have a variety of uses for the photographer/videographer. They can be used for:
Balancing sky/foreground exposure in landscape/seascapes (graduated ND Filter)
Allowing the use of wide apertures in bright lighting conditions (to give shallow DOF)
Allowing the correct shutter speed for video recording
Allowing long time exposures to create motion blur
Removing people from busy town pictures (long exposure)
Protecting the camera when exposing images which have extreme brightness e.g. the sun.
ND filters come in a variety of mounts, from metal rings which screw into the lens thread or as glass or acrylic filters which slide into a filter holder. (often referred too as the original patent the COKIN filter) The filter holder being attached to the camera lens by a threaded adaptor plate. If using graduated neutral density filters then they are normally only available as the later type. Filters are designated by strength. starting at ND2 which attenuates light by 50% and is the equivalent of 1 EV or Fstop, ND4 which attenuates 75% of the light and is the equivalent of 2EV or Fstops, ND8 which attenuates light by 87.5% or 3EV or Fstops. This notation is from the binary where 2 to the power of 1 = 2, 2 to the power of 2 = 4 and 2 to the power of 3 = 8 etc. They may also be designated as 0.3D, 0.6D or 0.9D where each 0.3D is equalt to 1EV or Fstop These are the most commonly available types. For professional use ND filters which can attenuate 99% are available (such as the Tiffin Filter range). These are referred too as 10 Stop filters. (an inexpensive DIY filter can me made from and electric arc welders face shield glass - however there may be significant colour shift involved). With this level of attenuation the viewfinder becomes useless and metering impossible. It is necessary to compose the shot before putting on the filter, look at the normal exposure for the scene and then manually setting the exposure equal to the reduction in stops because of the applied filter glass.
All ND filters have a tendancy not to attenuate all wavelengths of light equally. This results in a noticable colour cast on the image. To rectify this a manual white balance can be performed in camera with the filter attached or by shooting RAW format and manually setting the White Balance in editing. In some cases it is the amount of infrared light which passes, unattenuated, through the filter which causes this problem. It is more apparent with cameras where the IR filter over the sensor does not attenuate IR light completely. The more expensive professional filters like the B & W 3ND actually have IR filtration in the filter and hence produce more neutral results - but at a heafty price tag £90 in the UK
19th October 2013
I have redesigned the "Hints and Tips Cards" following a suggestion from another Youtube viewer. Each section will be differently colour coded. Camera set ups will be headed in Black, Hardware modifications in Brown, Technical set ups in Red etc. It will make it easier for you to locate information more quickly
Converting a Compact Digital Camera to Shoot Infrared Only
15th January 2014
All digital cameras are able to "see" infrared light to varying degrees. This is largely due to the way in which the infrared blocking filter filter works with varying manufacturers designs. You can see this if you point a TV remote control at your camera whilst it is in the live view mode. You will see a pink/magenta flashing image which is the camera responding to the infrared light emitted from the remote control. If we remove this infrared blocking filter from the camera ( as I demonstrate in my Youtube video http://www.youtube.com/watch?v=frtQxryDTo8 ) the camera becomes very much more sensity to light in this wavelength. If you repeat the test with the remote control you will see just how much light is being emitted. If we simply want to take pictures using the camera in this way and illuminate the subject with some form of infrared light we can effectively take pictures in total darkness!
To make the camera responsive to infrared only and totally block out all visible light we have to install an infrared pass filter either before the sensor or in front of the lens. It is far easier to do the later. By fitting a IR pass filter it effectively chops all light of a wavelength below 720 nm. With such a filter in place you can use the camera to photograph scenes by infrared light in daylight. landscapes take on a new surreal look and in the second part of this series I'll show you what can be achieved.

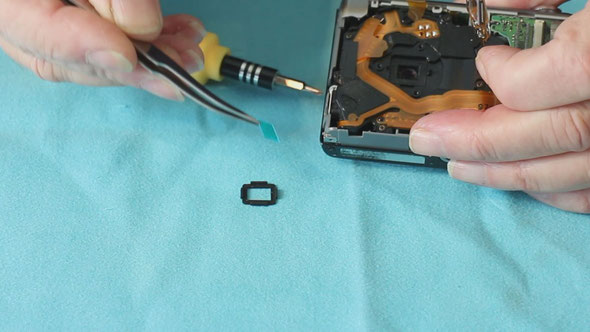
Update April 2016
I've now added another video showing how to remove the filter from later cameras which do not have the IR filter held in a small gasket.
The newer types have the IR filter attached with a double sided adhesive tape.
The procedure to remove the filter need the insertion of a very sharp modeling knife blade between the filter and the paper mask. Slicing through the adhesive a little at a time from both sides until it is free. Excess pressure will break the filter!
My new video for later cameras
Shooting in the 16:9 Aspect Ratio? If not, may be you should?
12th January
In today's digital world we have grown accustomed to seeing 16:9 images everywhere. Smartphones, tablet pc's, HDTV, cinema, laptop and desktop monitors. In a recent survey of viewers of this blog site I found out that very few people now bother to print out any of their images. The majority just file and view their images on their PC or upload to one of the many social networking sites. A few, like me, produce video content material as well (so called "hybrid" photography). With the main emphasis on this type of delivery media itt makes perfect sense then to set your camera up to shoot in this format so that you know exactly what the framing will look like. When in comes to displaying images on a HDTV format video the question always arises - what format to shoot for something that has a natural portrait orientation. Let me suggest 1:1 or square as the best candidate. Using 16:9 vertically gives very wide side margins and 4:3 and 3:2 have similar problems. If you compose and shoot at 1:1 then this will provide the best compromise on the final display Here are some examples. Click to see the full 16:9 representation. The grey bacground represents the side margin. One technique to add a different view is to display the same photo behind the main image but enlarged to fill the frame and then blurred.
The first image is a 1:1 image set on a HDTV (16:9) video editing timeline, the second image is a full frame 16:9 format image on the same timeline.
Editing Panasonic JPEGS in Canon DPP software


If you have any Canon camera then if you have installed the Canon Utilities disk then you can use the Digital Photo Professional application (DPP) to edit Panasonic (or any other) Jpegs. The advantage - EXCELLENT NOISE REDUCTION provision which really cleans up Panasonic Image Noise. You can update to the latest version of the software from Canons website to get the latest features with the program. You can edit with all the usual brightness, contrast, saturation sharpening etc but the inclusion of an easy to use noise reduction section really helps your image.
users can download from after selecting the right operating system
https://www.canon.co.uk/support/consumer_products/products/cameras/digital_slr/eos-80d.aspx?type=software&language=&os=WINDOWS 10 (64-bit)
email me and I will give you a serial number to complete the installation