 Graham's Photography Blog & Technical Reviews
Depth of Field, Aperture, Focal Length and Subject Distance Interaction.
How does the interaction of lens focal length, aperture and subject distance affect depth of field?
Well first of all depth of field is described as the acceptable zone of focus between the foreground and the background in an image.
It is generally accepted that aperture is the main way to change the depth of field, however it is not the only element that will affect the image.
For example choosing a shorter focal length will increase the depth of field if the camera aperture and subject distance remain the same.
Conversely changing to a longer focal length lens will reduce the depth of field, again if the camera aperture and subject distance remain the same.

When a lens images a scene there is only 1 plane of focus where the image will be sharp.
in front of the image and behind the image the amount that the image appears out of focus depends upon the lens aperture.
A large aperture, f2.8 for example, allows the rays of light to converge in front of this plane of focus for parts of the subject further away and to converge behind the plane of focus for parts of the image closer to the plane of focus.
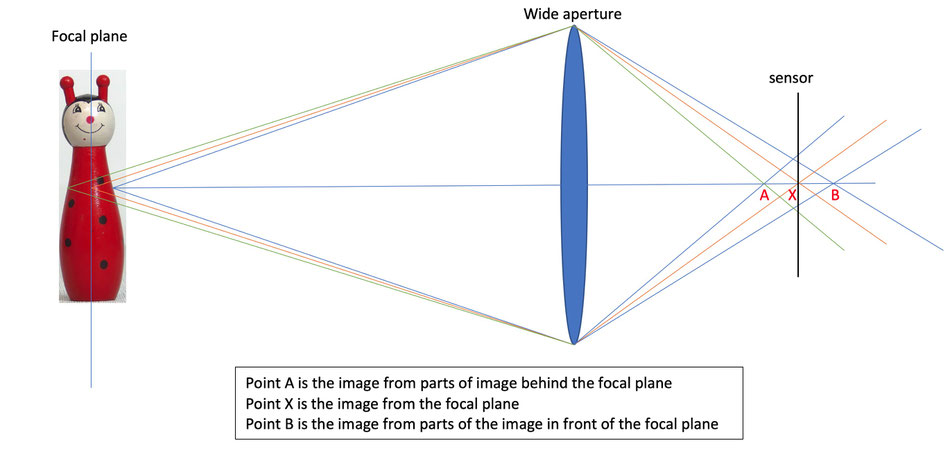
With a wide aperture the light rays from the subject plane of focus focus at point X in the above diagram. Rays from in front of this plane are imaged behind the sensor at point B. This creates and out of focus point called a circle of confusion (COC). This COC depends upon pixel size.
Similarly rays from behind the plane of focus are imaged in front of the sensor at point A. As the rays continue on to hit the sensor again they form a focus point which is out of focus.

With a small aperture the rays of light are directed towards the sensor with a much tighter pattern thus the circles of confusion are much smaller. This gives the impression that more of the image is in focus.

Capturing an image at 50mm with the f2.8 aperture and the subject exactly 1 metre from the camera. The size of the focus point in the image is 300pixels.
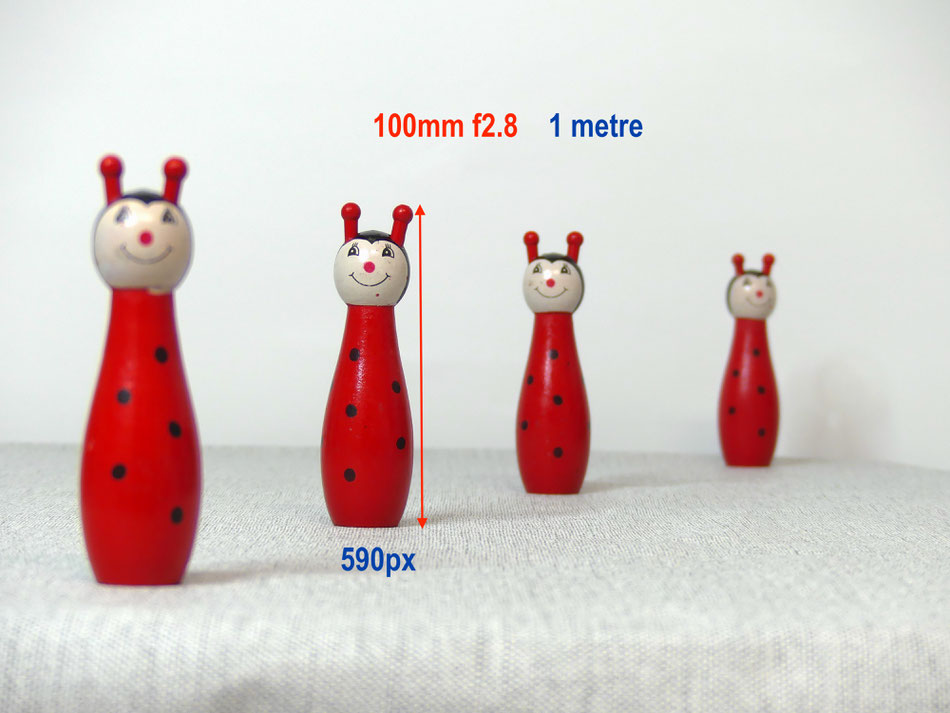
If we then use a 100mm focal length lens with the same settings you can see that the image height is twice the size as the one at 50mm. This is as a result from an equation that states that if you double the focal length the resulting increase the size of the image is exactly twice.
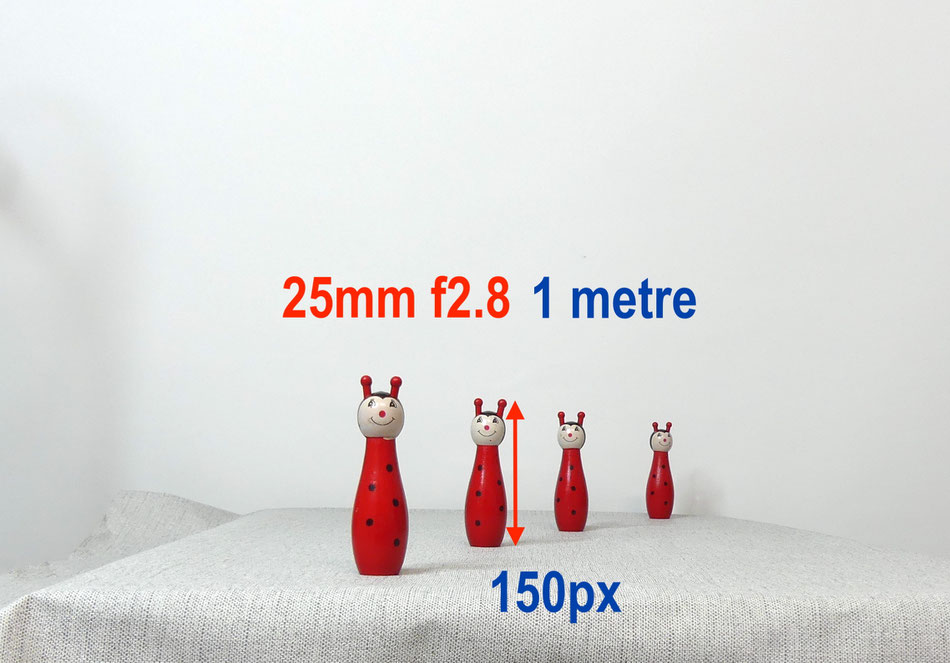
Similarly if you switch to a 25mm lens and use the same shooting parameters you will find that the image size is 1/2 the size as the 50mm image. (in the above image I have changed the size of the image to show the dimensions more clearly).
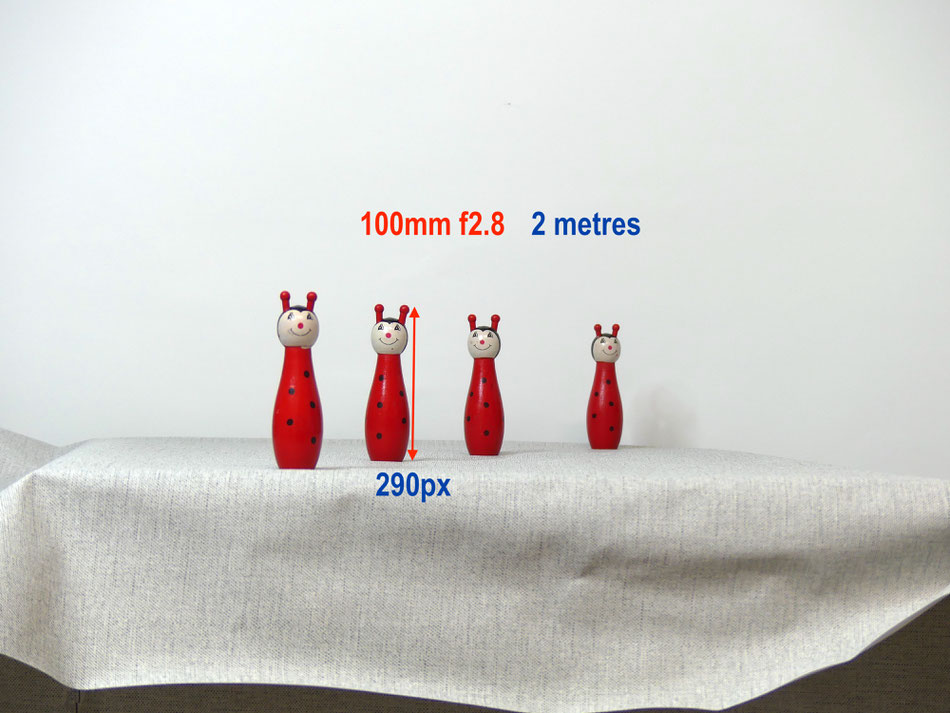
Now if you switch to 100mm, the resulting image would be twice the size as the 50mm image however if you move the camera back to twice the distance the image size is reduced by 1/2 so we end up with the same image as a 50mm lens at 1 metre. So the effects cancel each other out!

If we then change the focal length to 200mm the resulting image becomes the same size as a 100mm lens at 1metre.
So armed with this simple halving and doubling of distance and focal lengths you can quickly estimate the resulting changes if you altered either the focal length or changed your shooting distance.
If we talk about depth of field and hyperfocal distances then if you use tables or smartphone apps to calculate the hyperfocal distance for any given shooting set up of aperture and lens focal length then you may find out that the resulting image does not bear any resemblance to what you was expecting. The simple reason that these tables don't work is that they do not work is that they do not take into consideration either the image size or the viewing distance!

This image looks sharp at this size

However if it was to be viewed larger it is clear that the back of the image isn't in focus.
Panasonic HD lenses
The HD designation on some of Panasonics micro four thirds lenses refers to the fact that they have a step-less aperture when used for video. That is to say the aperture can be any value between f-stops. This is an advantage if you are shooting video in a fully auto mode as when you change camera position, or zoom the lens, the camera will adjust the lens as you do so in micro steps. The result is that the video clip will keep the same exposure without a noticeable jump in brightness as the lens changes from f-stop to f-stop to compensate. They also have much quieter focus motors and the image stabiliser is also able to operate much quieter making video recording far easier using the camera internal mics.
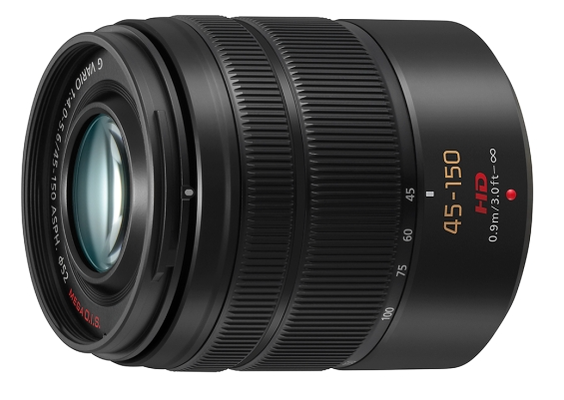

When these lenses are used for stills photography they will change in 1/3 or 1 f-stop increments as set in your lens EV set up.
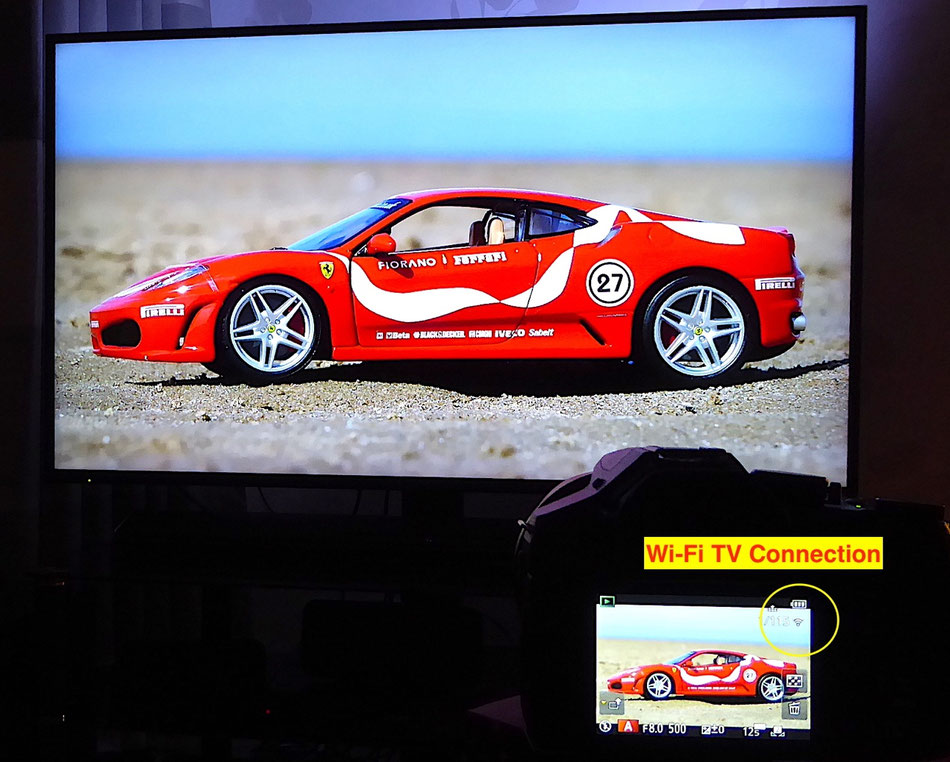
Displaying Panasonic Lumix Wi-Fi enabled Camera images on a Smart TV
There is something about being your images displayed on a large screen TV and with the increasing push from manufacturers to get more and more devices out there with 4K ready displays now is a good time to get ready to embrace the challenge and connect your camera wirelessly to your "smart tv".
HDMI connection is still the most direct and easy way to display your images and it allows full playback of both still images and video clips from the camera on the device however this means the camera is physically connected to the device and limited to just a few metres away governed by the length of the HDMI cable.
With a wireless connection you are freed from this restriction and you can display still images fairly easily using this method. Video streaming is still something that is presenting me with a challenge, in theory it should be possible using the wi-fi network centred around your broadband router using DNLA connection but getting this working is something of a challenge.
Even connecting via wi-fi requires some steps that have to be done in the right order otherwise the connection will not take place.
Here then is the way that the Panasonic cameras use wi-fi to link to Panasonic Viera Smart Tv's. I'll be trying Samsung shortly.
To begin the wi-fi set up you will need to access the TV menu system to reveal the TV network options.

On the Panasonic TV series the network setting appear as the second option in the main menu of the device.

Choose network Connection and then choose the manual set up mode from the the lower section of the display

From the menu header you need to select the Wireless Access Point
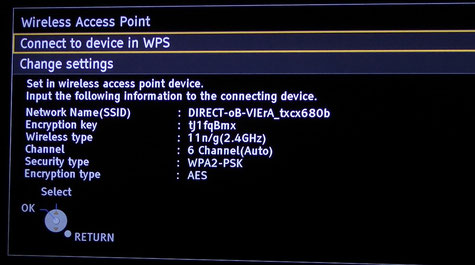
Then select the Connect to Device in WPS mode

If your Router is situated locally you might use the Push Button option however the PIN is really simple to type in and is the most reliable method that I tried.
As with most wi-fi set ups there is a time limit to some of the necessary steps.
Having reached this point in the TV set up part it's time to switch to the camera set up part to get the required PIN code to connect to the TV.
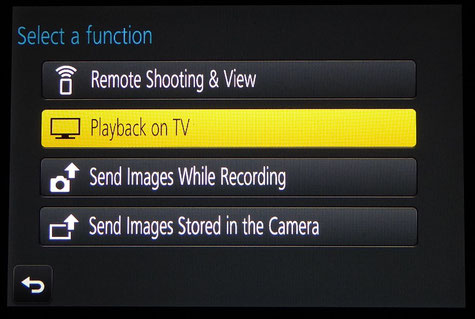
From the Set up menu of the camera using the menu or pressing the wi-fi button on the camera (if it has a dedicated one) select the
"Playback on TV" option

From the "Via Network" for the connection method
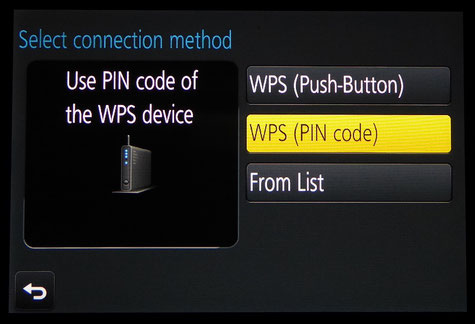
Now select the WPS (PIN code) option from the menu (or the WPS {push button} if you are using the router WPS method)

From the Destination Access Point choose the name of your TV that is being broadcast.

The camera will display an eight digit PIN code for use with the connecting device.
Once this is displayed it is time to enter this PIN code into the TV menu that is now waiting for it.

When you enter this PIN code and press OK on the TV remote control you should get the "Connection Successful" message, then press OK on the TV remote once again.

The final step is to confirm the connection with the camera
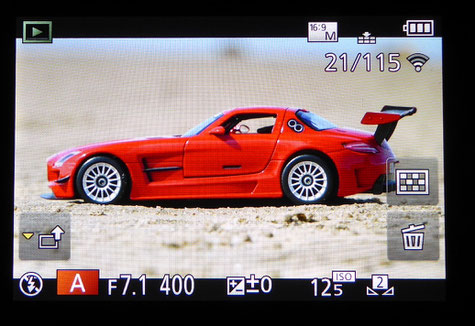
When the set up is complete you will be able to see the image from the camera being displayed upon the TV device, use four way cursor buttons left or right to navigate through the images stored on the card.
Alkaline versus Zinc Carbon Battery Testing
I use quite a lot of AA batteries in photographic equipment like flash guns, wireless remote controls and LED lights.
Whilst NiMH batteries do have a cost advantage and I tend to use them as the primary power source Alkaline batteries offer a higher terminal voltage at both initial and discharged state. This means my flash guns recycle faster using them. If I have a need to shoot with flash then recycle times may be a significant factor in getting the results that I need.
Zinc Carbon batteries are very much cheaper however they do not have the same power handling capacity and really meant for low discharge applications. Deep discharging of Zinc Chloride cells leads to leaking batteries so it's best avoiding them.
I needed to know which of the readily available AA Alkaline batteries were the best performers in both mAH terms and £ per unit.
I devised a discharge test using a recording multimeter and put a 4.7 ohm load across the cell and recorded the load voltage from connection until the load voltage dropped to about 0.9 volt. The current was about 325mA at the start of the test.
The Zinc Carbon battery had a very non linear discharge with a few recovery peaks occurring during the discharge time but it soon reached my cut off point. The Alkaline batteries gave a very consistent discharge rate and 3 of the batteries available at the lowest cost - The Wilco, Sony and Kodak Xtralife all gave very close performances. All three of these batteries were considerably cheaper to purchase as well. The Kodak Xtralife were sold in packs of 6 for £1 and the Fusion and Sony 4 for £1.
All the alkaline batteries gave at least a six times advantage in running time compared to the zinc carbon battery. The Philips battery I did find a pack of 48 batteries plus 12 AAA for £7 which meant really low unit prices.

The Zinc Chloride (pale blue trace) reached my 0.9 volt cut off after about 2 hours and 10 minutes at the 325mA discharge rate. All the alkaline batteries took over 7.5 hours to drop to this level giving a x7 advantage at only double the cost. The NIMH Eneloop batteries started off with a lower terminal voltage but maintained a higher average discharge current for longer. I tested 8 types of Alkaline cells but have only plotted three here as the graph gets messy. It serves to show the average discharge curve of Zinc Chloride versus Alkaline Versus NiMh (Eneloop) cells.

So from the tests it would appear that the Kodak Xtralife batteries, Wilco with their distinctive orange battery sleeve and the JCB batteries had the highest performance but in general all the alkaline tracked fairly close to each other so in my opinion it is not work going for the premium branded batteries as they do not perform ant better in my tests here. The Philips 24 pack of AA plus 12 AAA for only £7 at B&M Home stores was the best price I found for these batteries and I've stocked up on a few packs.